A Comprehensive Guide to Crafting a Festive Paper Turkey
Related Articles: A Comprehensive Guide to Crafting a Festive Paper Turkey
Introduction
With enthusiasm, let’s navigate through the intriguing topic related to A Comprehensive Guide to Crafting a Festive Paper Turkey. Let’s weave interesting information and offer fresh perspectives to the readers.
Table of Content
A Comprehensive Guide to Crafting a Festive Paper Turkey
The paper turkey, a staple of elementary school classrooms and autumnal crafts, holds a unique place in our cultural lexicon. Its creation, a simple yet engaging activity, fosters creativity, fine motor skills, and a sense of festive spirit. This guide delves into the art of paper turkey decoration, offering a comprehensive exploration of techniques, materials, and design considerations, ultimately revealing the transformative power of this humble craft.
Materials and Tools
The beauty of paper turkey crafting lies in its accessibility. The core materials are readily available, making it a project suitable for all ages and skill levels.
- Construction Paper: The foundation of the turkey. A variety of colors can be used, allowing for diverse and vibrant designs. Brown, orange, and yellow are classic choices, but exploring other shades, like purple, blue, or even metallics, can add a unique touch.
- Scissors: Essential for cutting out the turkey’s body, feathers, and other decorative elements.
- Glue Stick or Glue: Secures the various components of the turkey. Glue sticks offer a clean and manageable application, particularly for younger crafters.
- Markers, Crayons, or Colored Pencils: These tools allow for detailed coloring, adding intricate patterns, and personalizing the turkey’s appearance.
- Googly Eyes: Add a playful touch to the turkey’s face.
-
Optional Materials: These enhance the turkey’s visual appeal and complexity.
- Glitter: Adds sparkle and festivity.
- Sequins: Provide a shimmery texture.
- Pom-poms: Create fluffy accents for the turkey’s wattle or tail feathers.
- Feathers: Real or artificial feathers can be used to add a touch of realism.
- Beads: Offer decorative accents and can be strung together to create necklaces or embellishments.
- Yarn or String: Used for hanging the turkey or creating additional decorative elements.
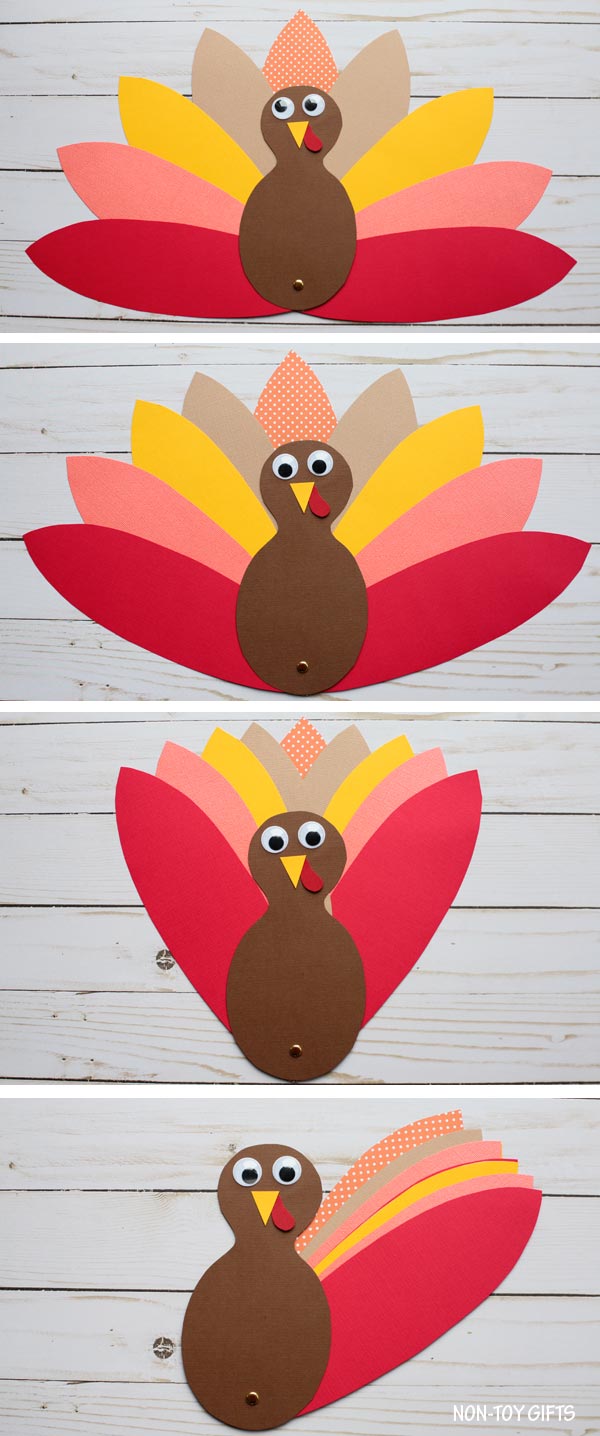
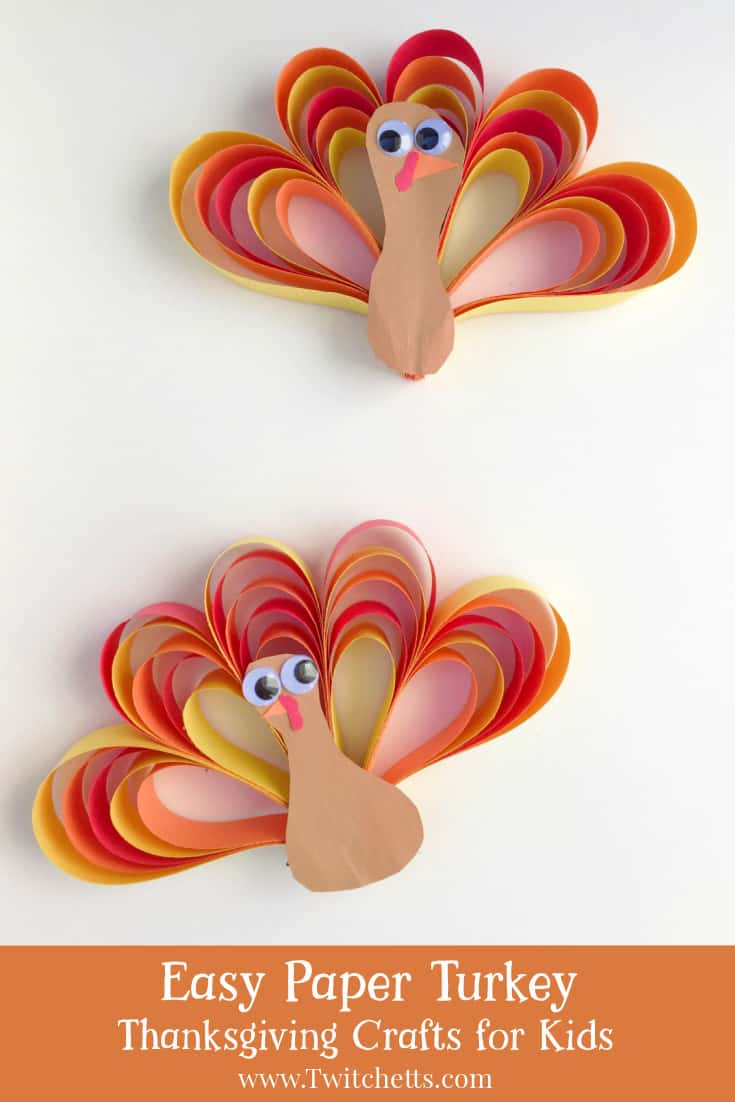
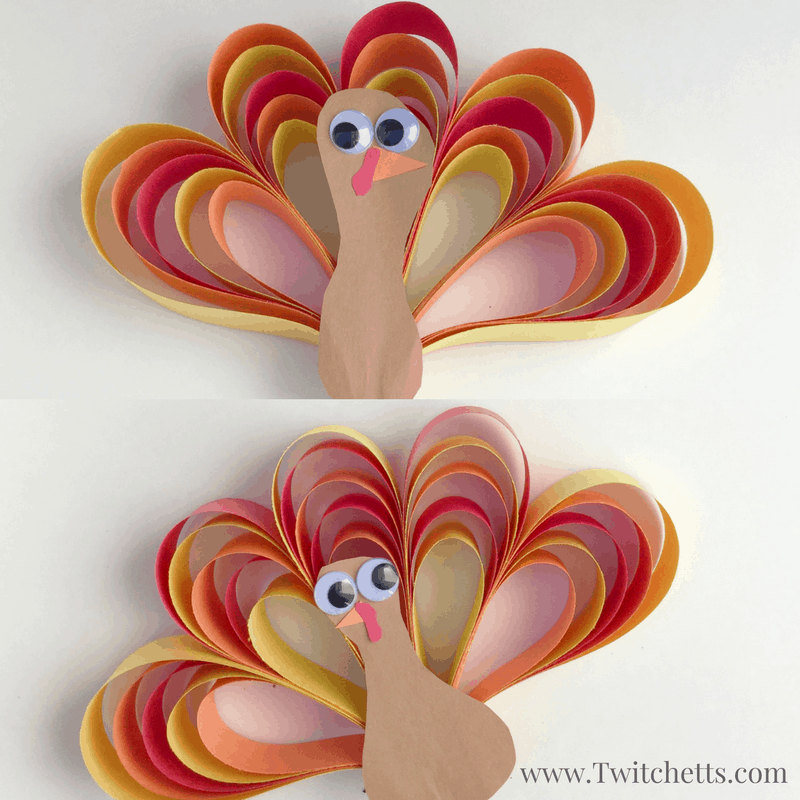
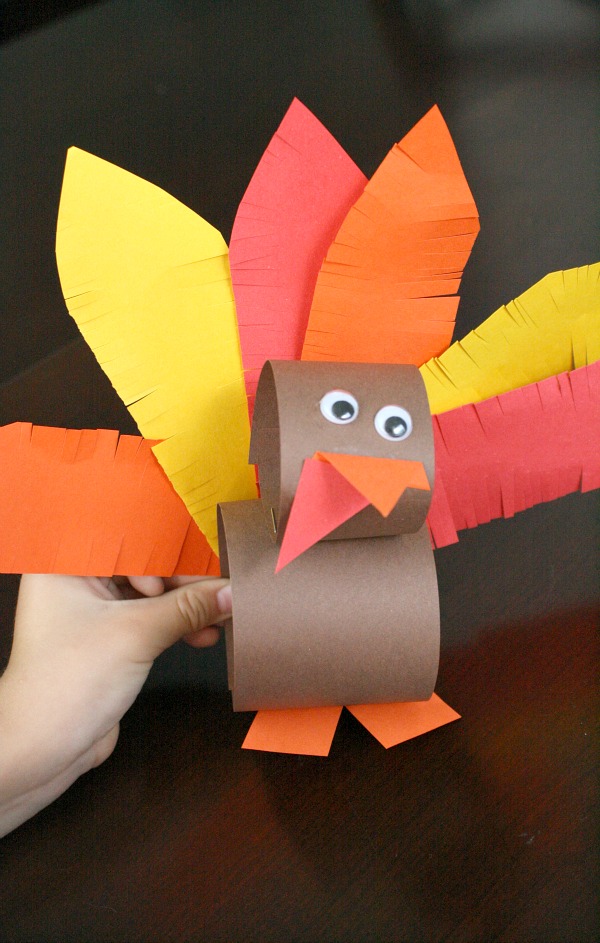
The Foundation: Constructing the Turkey Body
The first step is creating the foundation for the turkey. There are two common methods for constructing the turkey’s body:
1. The Folded Method:
- Step 1: Fold a sheet of construction paper in half lengthwise.
- Step 2: Fold the paper in half again, forming a rectangle.
- Step 3: Cut a curved shape from the open end of the folded paper, creating the turkey’s body.
- Step 4: Unfold the paper to reveal the turkey’s body.
2. The Cut-Out Method:
- Step 1: Draw or trace a turkey body template onto a sheet of construction paper.
- Step 2: Cut out the turkey body using scissors.
Adding the Tail Feathers:
The tail feathers are the defining feature of a paper turkey. Here’s how to create them:
- Step 1: Cut out several strips of construction paper, varying in length and width. These will form the tail feathers.
- Step 2: Cut the ends of the strips into rounded or pointed shapes, depending on the desired look.
- Step 3: Glue the tail feathers to the back of the turkey’s body, arranging them in a fan-like shape.
Decorating the Body:
Once the body and tail feathers are in place, it’s time to unleash your creativity.
- Coloring: Use markers, crayons, or colored pencils to color the turkey’s body. Create patterns, stripes, or polka dots, or simply add a solid color.
- Details: Add details like a wattle (the fleshy part under the beak) using a contrasting color.
- Eyes: Glue on googly eyes or draw them with a marker.
Embellishing the Turkey:
This is where the optional materials come into play, adding a touch of whimsy and personality.
- Glitter: Sprinkle glitter over the turkey’s body or feathers for a sparkly effect.
- Sequins: Glue sequins onto the turkey’s body or feathers for a shimmery touch.
- Pom-poms: Attach pom-poms to the turkey’s wattle or tail feathers for a fluffy accent.
- Feathers: Glue real or artificial feathers to the turkey’s tail for a more realistic look.
- Beads: String beads together to create a necklace for the turkey or glue them onto the body or feathers.
- Yarn or String: Use yarn or string to hang the turkey or create additional decorative elements, such as a hat or a scarf.
Beyond the Basic Design:
The paper turkey offers a canvas for endless creativity. Here are some ideas to explore:
- Thematic Designs: Create turkeys that reflect a specific theme, such as Thanksgiving, Halloween, or a favorite book character.
- Character Turkeys: Transform your turkey into a specific character, like a superhero, a princess, or a cartoon character.
- 3D Turkeys: Experiment with folding techniques to create a three-dimensional turkey.
- Collage Turkeys: Use various materials, such as fabric scraps, buttons, or natural elements, to create a unique collage turkey.
The Importance of Paper Turkey Crafting
The act of creating a paper turkey transcends mere craft. It embodies a celebration of creativity, a connection to tradition, and a reminder of the simple joys of making. The process engages children and adults alike, fostering a sense of accomplishment and pride.
FAQs
1. What is the best way to hang a paper turkey?
- Attach a loop of yarn or string to the top of the turkey’s head.
- Alternatively, you can use a hole punch to create a hole at the top of the turkey’s body and thread a string through it.
2. How can I make a paper turkey stand up?
- Fold a small piece of construction paper into a triangle and glue it to the bottom of the turkey’s body.
- Alternatively, you can use a small piece of cardboard or a bottle cap as a base.
3. Can I use recycled paper for my paper turkey?
- Absolutely! Recycled paper is a great option for creating a sustainable paper turkey.
4. What are some creative ways to use paper turkeys?
- Decorate your home with them for the holidays.
- Use them as place cards at a Thanksgiving dinner.
- Gift them to friends and family.
- Incorporate them into classroom projects or art displays.
Tips
- Use a ruler to ensure that the tail feathers are evenly spaced.
- Cut out the tail feathers in different shapes and sizes for a more interesting look.
- Experiment with different colors and patterns.
- Don’t be afraid to get creative and add your own unique touches.
Conclusion
The paper turkey, a simple yet timeless craft, offers a gateway to creativity, imagination, and a celebration of autumnal traditions. Whether it’s a simple creation or a complex masterpiece, the act of crafting a paper turkey fosters a sense of connection, joy, and the enduring power of imagination. So, gather your materials, embrace the process, and let your creativity soar as you create a paper turkey that embodies the spirit of the season.


Closure
Thus, we hope this article has provided valuable insights into A Comprehensive Guide to Crafting a Festive Paper Turkey. We hope you find this article informative and beneficial. See you in our next article!